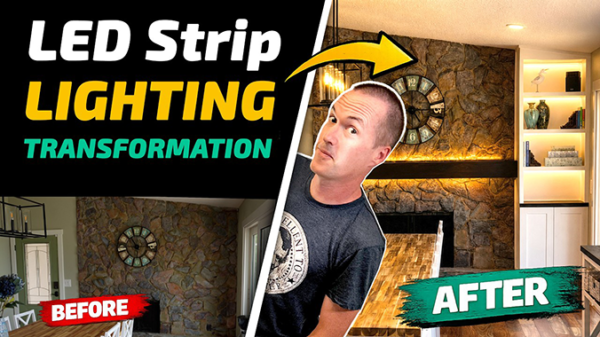
Pentair 5g retrofit DIY LED Pool Light for $60
August 26, 2020Today on the hookup I’m going to show you how to build an individually addressable LED pool light that is better than any commercially available product in every way, and I’m going to do it for about 10% of the cost.
When my Pentair LED pool light failed about 2 months ago, I almost fainted when I figured out that the replacement cost was going to be over $600 just for the parts. After a bit of research it was clear that I could probably just replace the circuit board inside the unit, which Pentair calls a “light engine”. Replacing just the LED portion would also save a bunch of time since I wouldn’t have to fish the power cord through the 100ft of conduit to get to my pool controller. The problem? Turns out Pentair must be making their light engines out of gold, truffle oil and magic, because this small circuit board costs $450.
Lets just take a second to breath that in. This board, with 12 LEDs and some very standard capacitors and resisters costs $450… So with that option scratched off the list based strictly on principle, I did a little more googling and ended up at a website called Florida Sunseeker LEDS. Florida Sunseeker makes a replacement LED kit for the Pentair Intellibrite for $260, which still seemed like a lot, but I was willing to give it a shot, so I dished out just under $500 to get the pool kit and the matching spa kit so the lighting effects could be synchronized.
A few days later I installed them and fired them up… and as someone with quite a bit of experience with LEDs the results were… disappointing. They were decently bright and the installation was simple, but because the LED chips they used are all single color, either red, green or blue, the colors looked a bit off to me, and the only way to change colors and patterns was to cycle the power on and off to advance to the next preset. There’s no way to add or change patterns, and no way to adjust the brightness or choose custom colors. You’re basically stuck with the 10 modes that are preprogrammed. If I wanted to be able to automate color changes, I would need to write a program that would keep track of current pattern and then understands the number of times it needs to toggle the power to get to the desired color, not impossible, or even that difficult, but way too clunky in 2020. So after 2 days of having the lights installed I was ready for something better.
My first thought was a WiFi or zigbee controller, and after shoving a cheap zigbee RGB unit into the fixture it immediately became clear why this product doesn’t exist: Zigbee and WiFi signals have no chance of passing through the water, no matter how close the access point is… I was going to need to come up with a wired, but the only wires passing into the light were 2 12V AC lines and a ground wire… If only there were a way to control LEDS with a 3 wire interface… hmmm…. individually addressable LEDS! Design time!
As I think I mentioned, the lights from Florida Sunseeker were pretty fairly priced compared with the Pentair replacement, and they more or less did what was advertised… but I did have some issues with some of their design choices.
Their first claim was that their 488 LED package was superior to pentair’s 12 led design based on sheer numbers, but that’s not really how LEDs work, and more LEDs aren’t necessarily better. Second, they claimed that including a heat sink on the back of the board allows it to dissipate heat better than the Pentair design… and this claim definitely failed the sniff test.
Pentair’s design uses a thermal compound to transfer heat from the LEDs to the light’s metal casing, which is then submerged in 10,000 gallons of water… effectively making the pool into a giant water cooler. The Florida Sunseeker design on the other hand is only connected to the metal casing in a single insulated mounting location and it uses traditional heatsinks to dissipate the heat using air. See the issue? Traditional heat sinks rely on air movement, and the light enclosure is both air and water tight so instead of having a direct thermal coupling between the LEDs and the metal housing, the florida sunseeker version uses air, which is a comparatively terrible conductor. Again, I’m not trying to bash the Florida Sunseeker product, because I think it works just fine and it was more or less fairly priced, but the original Pentair design with fewer LEDs and water cooling made much more sense to me.
So for my design I needed to find some high power addressable LEDS, and some metal to mount them on. I knew that individually addressable flood lights existed, so I just needed to find a source for their guts and after a few minutes looking around on AliExpress I was able to find some 9 watt individually addressable LEDs for a pretty great price, $40 for a pack of 5.
The plan was to mount three LEDs on an aluminum sheet, which I could then bolt to the existing housing so heat would be transferred from the LEDs, to the aluminum mount, to the metal housing, and finally into the pool water. I used aluminum because it doesn’t rust, and I specifically purchased thin aluminum so it would be easy to bend and easy to cut with a pair of tin snips. This sheet cost me about $10 at my local hardware store.
Since I wanted to use the original mounting locations in the housing I just used the broken Pentair light engine to make a template for my new lights. Instead of pointing all the lights straight forward I wanted to angle them slightly to try and create some movement effects in the pool, but to be honest I don’t really think it worked, so you could probably just mount these things on a flat surface pointing straight out with the same outcome.
Another thing that didn’t quite go as planned was the thermal tape that I bought to stick everything together. The stickiness of the tape definitely wasn’t going to cut it so I also had to add screws to hold the LEDs in place… so I probably would have been better off using thermal compound instead of the adhesive. Still, after less than an hour of building I had a pool light with 3 9 watt LEDs and a spa light with a single LED ready for installation.
The next hurdle to overcome was the power supply, and this was the only part of this project that I was nervous about and the last thing I wanted to do was electrocute a swimmer in my pool. To do that I needed to change the AC voltage to DC. High current bridge rectifiers are available on Amazon for about $2 each, so I picked up some hefty ones that would be operating far below their rated maximum current and voltage.
My transformer outputs a little over 13 volts AC and the rectifiers I used have forward voltage drop of 1.1 volts, which gaves me about 11.9V DC (RMS), perfect for this application. Rectified voltage isn’t constant and instead bounces back and forth between 0 volts and whatever the maximum voltage is. To smooth out that ripple capacitors are placed in between the positive and negative terminals, and the larger the capacitor the smoother the voltage. By pure luck the LEDs that I purchased from AliExpress already came with a 47 microfarad capacitor so no additional smoothing was necessary. However, to power your microcontroller off this power source you’re going to need both a capacitor, and a voltage regulator, if you are comfortable with this kind of thing, make your own, but for everyone else I’d recommend buying a premade solution like the DigUno by QuinnLED that already has a capacitor and voltage regulating circuit. Links are down in the description for buying them pre-assembled, or you can even get the circuit boards printed yourself by this video’s sponsor: PCBWay.
On with the installation.
It’s always a good idea to turn off the breaker for your power supply before working on it, even if the pool light switch is off. Inside the weatherproof box you’ll find a large transformer with mains AC power coming in on one side, and low voltage AC coming out the other side. To hook up your recitifier you can either use spade terminals or pre-solder some wire leads with heat shrink to connect to the existing wires using wire nuts. On most rectifiers the positive and negative output terminals are labeled and the AC inputs are diagonal from each other, but make sure to use the datasheet for your specific rectifier when hooking it up.
I used wire nuts to connect the low voltage AC outputs of my triple isolated power supply with the AC lines of the rectifier and then I connected the outputs of the rectifier with the wires going out of the box to the pool light which in my case were white, black, and green. I chose to use the green ground wire for data, black for negative, and white for positive. Since black is 0 volts DC we can also ground it to the earth terminal in the triple isolated box.
Next it’s time to pull the light out of the pool. My pool light uses a typical niche design which means the light is only connected with a single screw and behind the light there is enough spare wire to work on the light on the pool deck without the need to drain any water from the pool.
The light unit is held together with a tension ring attached with a single nut and bolt combo. I used an impact driver to quickly take it off, then set the glass and silicone gasket to the side. At this point it may be a good idea to replace the silicone gasket, since I’ve read that it is a common failure point, and unlike the rest of pentair’s replacement parts, they seem pretty fairly priced.
Unfortunately, unlike the wires in the power supply box, the wires in the pool light were white, white, and green. So I needed to figure which wire was connected to the positive terminal of my rectifier and which was the negative.
To do this, I completely disconnected the wires inside the light and flipped the switch for the pool light, then I used a multimeter to figure out which wire was which. To do this you just select DC voltage on the multimeter dial and then connect one probe to each wire, if the resulting voltage shown on the multimeter is positive then you have the red probe connected to the positive wire, and if the resulting voltage is negative, you have the red probe connected to the negative wire.
After identifying the negative wire I wrapped a bit of electrical tape around it to identify it and then turned the breaker for the pool light back off. I used a bit of solder to make the connections between the LED wiring harness and the existing wires and then I wrapped each of the connections with electrical tape. I needed to do a little bit of trimming of my aluminum mount it to get it to fit properly and the mounting holes were a bit small, but after sizing them up a bit everything fit perfectly. A few lock nuts later and the light was ready for reassembly.
The spa replacement was basically identical, remove the light, locate the positive and negative wire, solder on the new wire leads and plug everything in.
The next step was to test it out the lights using a microcontroller. I happened to already have a NodeMCU microcontroller connected to my pool that handles the rest of pool’s automation, so I just added the LED functionality to my original program, but if you’re not a programmer I’d highly recommend the WLED firmware and a 12V DigUno from QuinnLED that I mentioned before… there’s tons of great resources to learn about every step of setting them up and they won’t require you to do any additional soldering. I’m not affiliated in any way, it’s just a good product. Another issue you will probably run into is that metal boxes do a pretty good job of blocking WiFi signal, so I’d recommend using a D1 mini pro instead of a D1 mini because the pro has a connection for an external antenna.
Now that the project is complete, it’s time to figure out if my solution was any better than the previous two, and the first test I did was a brightness test. These videos were taken in manual mode with identical settings on my sony camera. In this view I tried to replicate the “white” light that was produced by the florida sunseeker LED package and as you can see the DIY version looks a bit dim comparatively. However, kicking my LEDs into full brightness white shows that they can actually produce more light than the florida sunseeker, even though it comes out a little heavy on the blues.
But remember, my issue with the Florida sunseeker package wasn’t the brightness or color, it was that it only had 7 colors to choose from, and the only way to change them was to continually cycle the power. My solution has 16 million colors, fully adjustable brightness, and as many animations as you could ever want, all selectable with a simple interface that is easily automated.
So to recap: Total parts cost here for both the pool and the spa light were under $60, and building and installing everything took about 3 hours. For that work we ended up with better color, better animations, better control, and less power consumption. The only thing left to see is how long they last, but with the heat sinks connected to the housing and the pool acting as a water cooler, they should last for years and years of daily use. Also, if a single unit dies, you can easily replace just that one LED unit for about $13. Overall I’m calling this project a huge win and it gets my overwhelming seal of approval. If you want to give this project a shot, I’ve got links to all the parts that I used down in the description, and feel free to ask questions in the comments section if you run into any trouble.
Thank you to my awesome patrons over at patreon for your continued support of my channel, if you’re interested in supporting my channel please check out the links in the description. If you enjoyed this video please hit that thumbs up button and consider subscribing, and as always, thanks for watching the hookup.
As I mentioned, this video was sponsored by PCBWay, which is a full featured PCB manufacturing service. PCBWay can of course manufacture printed circuit boards that you’ve designed, but they also have a huge library of shared projects from different creators for you to browse through. The DigUno by QuinnLED that I suggested in this video for instance can be printed at PCBWay, and by using their service, you’re not only getting boards for super cheap, but you’re also supporting the maker community. Also Thank you to my awesome patrons over at patreon for your continued support of my channel, if you’re interested in supporting my channel please check out the links in the description. If you enjoyed this video please hit that thumbs up button and consider subscribing, and as always, thanks for watching the hookup.