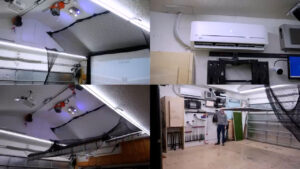
DIY Golf Simulator FOLDS into the ceiling in 5 minutes! Park cars in the garage AND have a sim!
February 10, 2023Ideas Team: I want to build a golf simulator in my 2-car garage.
Execution Team: Great, we can probably do that. Any special requirements?
Ideas Team: Yeah, unfortunately I’ve only got 8 ½ foot ceilings.
Execution Team: Oof, alright.
Ideas Team: Oh, and I still want to park both cars in the garage, so it can’t take up any room.
Execution Team: Umm…
Ideas Team: And it needs to set up and tear down in less than 5 minutes.
Execution Team: Okay… anything else?
Ideas Team: Yeah, I’m kind of on a budget, so I’d like to save money wherever possible.
Execution Team: Of course you do.
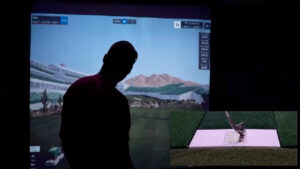
Golf simulators are a great way to get a little exercise, improve your game, and have fun with friends, and while they used to be insanely expensive, new launch monitors and falling projector prices have made them significantly more affordable. So I’m going to run you through each of the key parts of my home simulator and show you how I built them, how much they cost, how long it took me and I’ll definitely point out the mistakes I made along the way. As always there are no sponsored reviews on my channel, and I paid full price for everything you’re about to see.
Execution Team: This video just sounds like an excuse for the fact that you’ve been building a golf simulator instead of working for the last 2 weeks.
Ideas Team: Yeah, we’re done with this bit.
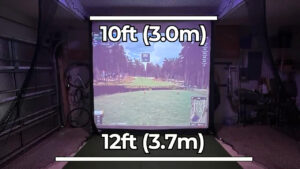
The first thing you need for a simulator is a room to put it in. In Florida we don’t have basements, so the garage was my only real option. As for dimensions, to comfortably swing a golf club without needing to offset your screen you’ll need about 12ft in width and depending on the launch monitor you choose, you’ll need between 10ft and 18ft of total length. More on that later. However, the area where you are most likely to run into issues is with ceiling height. I’m 6’1”, so my 8 ½ foot garage ceiling made it impossible for me to swing any club longer than a 7 iron without smashing it into the ceiling.
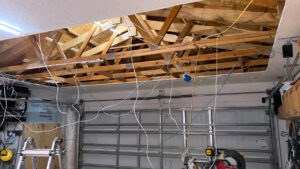
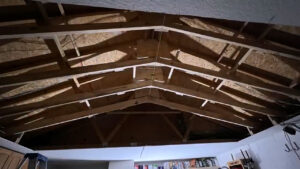
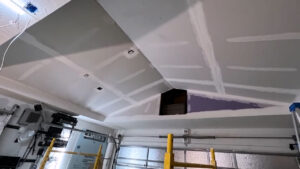
In my case, above most of my garage was just an attic space and a roof, so vaulting the ceiling was a possibility. I contacted four different local engineering firms about the project and got quotes ranging from $1000 for the truss modification engineering plans only to $35,000 from a full-service engineering and contracting firm who would take care of the whole ceiling project.
$35,000 was way out of budget, so with a set of engineering plans in hand and the help of my extremely handy brother-in-law, I was able to modify four trusses giving me 10ft of vaulted roof space in the middle of my garage. The actual truss modifications took about 13 hours for me and my brother-in-law, and materials were $350 which was mostly southern yellow pine 2x8s, plywood, and a giant box of 3” framing nails. I also rented a battery powered nail gun from Home Depot, which was $50 for a 24-hour rental.
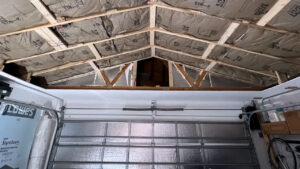
After that I spent two 10-hour days cleaning up wiring, doing some additional framing for the new attic spaces, pre-wiring for the simulator screen and projector, and insulating both the new garage ceiling, and the garage door.
And once all that was done, all that was left was drywall. So I hopped on Craigslist and sent about 20 text messages to tradesmen advertising drywall services, because screw drywall. I got a quote for $1200, which was well worth it in my opinion, because again, screw drywall.
So at this point there was no simulator in sight and I was already about $3000, and 40 man-hours deep, so hopefully your ceilings are already tall enough, but just know that if they aren’t, it is possible to raise them.
The next important part of a simulator build is selecting a launch monitor, which is the thing that watches your club and ball and figures out where and how far you hit it, and there are basically two ways to do that: You can use radar, or you can use cameras.
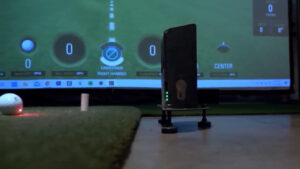
In a camera-based system, high speed high, frame rate cameras take images of your ball and club on impact to determine all kinds of stats like club face angle, club speed, ball speed, and a lot more. Because they use zoomed in cameras, the most important part about a camera based system is that your ball gets positioned correctly in the camera’s view. Camera-based monitors like the Uneekor EYE series are permanently ceiling mounted, but were way out of my budget while more affordable options like the SkyTrak, Bushnell Launch Pro and Foresight GC2 all get placed next to the ball. The good part about putting your monitor right next to the ball is that there isn’t any minimum distance behind or in front of the ball, so your room can be a lot smaller, but for a temporary setup the downside is needing to set up, align, and configure the monitor every time you want to play.
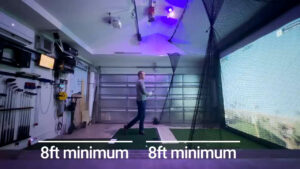
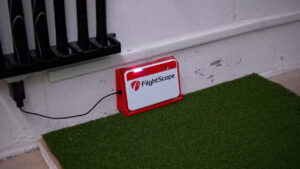
Radar-based monitors on the other hand need to be behind you, and most require at least 8 feet in between the monitor and your hitting area. They also need a decent amount of space to watch the ball’s flight path, so they also require 8 feet from the hitting area to the screen, so 16ft from wall to screen is the sweet spot, and my garage space was just long enough. Aside from the $19,000 TrackMan, the two most popular radar based systems are the Garmin R10 and the FlightScope Mevo+ and between the two the general consensus is that the R10 is more of a toy while the Mevo+ is more of a tool, so I coughed up the additional $1000 to get the Mevo.
Because my setup will be in the exact same place every time I was able to 3D print a wall mount for my Mevo+ that ensures it’s always in the perfect place and the perfect angle for my setup without needing to recalibrate it every time I want to play, and even though I technically could have used a camera system based on how my setup finally ended up, I still don’t have any regrets about choosing the Mevo+.
So moving onto the impact screen.
Impact screens are not the same as normal projector screens. Not only are they thick and tough, but they also have reinforced grommets around the outside to get the exact correct screen tension. You’re going to be hitting golf balls going well over 100 miles an hour from 8 feet away, so it’s going to take some punishment, and from what I’ve seen the cheap ones from Amazon are basically just heavy sheets and won’t hold up.
When it comes to temporary setups, the most common solution is to use 3 roller bars, one for the main impact screen and two for side protection. Unfortunately, a major limitation of roll up systems is that they tend to be significantly lighter and thinner than fixed screens which means a louder impact and less longevity. Also, balls can hit the metal roller on the top and easily sneak between the side protection and impact screen, so most vendors suggest putting in padded Velcro connections in between the front and sides, which is an extra part to store and an extra step in setup which requires a step ladder.
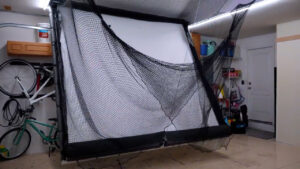
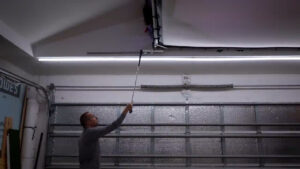
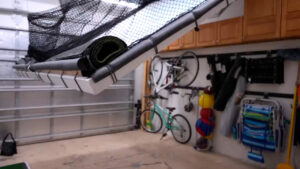
I’m a bit of a home automation nerd, and a common saying is that an automator will spend a full 40-hour week automating something just to save 5 minutes, and that’s exactly what happened here. So instead of using roller screens that would need a few minutes of additional setup every time, I decided to fold an entire fixed screen into the new vaulted ceiling.
I have a tendency to overbuild everything, so I decided on 1×3” steel tubing for the frame of the screen which I mitered and welded in the corners, and I added 1” flat stock bracing to give it some additional lateral strength. I’m basically just a hobbyist welder, but 14-gauge low carbon steel is very forgiving, and pretty hard to mess up.
I also WAY overbuilt the hinge mechanisms which consist of 1” cold rolled steel bars that rotate inside of 1” pillow block bearings that are rated for over 3000lbs of dynamic load. If these hinges were close to the middle of my garage I might be concerned about the weight since trusses are technically made to support the downward force of the roof and not things hanging from the ceiling, but these are less than 2 feet away from the concrete block walls, so they’ll be plenty strong.
Fully constructed the screen, turf and frame together weigh around 300lbs, so the hinges are at less than 10% of maximum load, but I also needed a hoist to raise it to the ceiling, so in the spirit of overbuilding everything I used a 440lbs capacity wireless hoist from Amazon, which is mounted to 12 gauge Unistrut lag bolted directly into the trusses.
Even though everything is way under 50% capacity, I also installed a safety system using linear rails and bearings that can support the weight of the screen in the event of a hoist failure of some kind. Cost for the screen frame materials, hoist, and safety mechanism was $550 and total build time was around 8 hours.
Because everything was custom built I could maximize the space and I ended up with less than an inch of clearance on either side of the screen, and about a quarter inch of clearance from the screen frame to the floor, which was actually a mistake that I’ll talk about a little later. My custom dimensions also meant that the screen needed to be a very specific size and thankfully, the impact screen manufacturer that I was already planning on using does custom screen sizes for no additional cost, so I was able to order the premium impact screen from Carl’s Place in my exact dimensions, with grommets, flaps and Velcro for $595, which seemed totally reasonable to me, especially since a main selling point of their premium screen material is increased sound dampening, which is definitely important in my garage space.
I used a mixture of 9” and 11” bungee cords through the pre-installed grommets. Tensioning an impact screen is a balancing act, because the more tension you have, the better the projected image will look, but high-tension screens cause the golf balls to bounce back significantly more, so I’ve gradually reduced the tension to reduce bounce back.
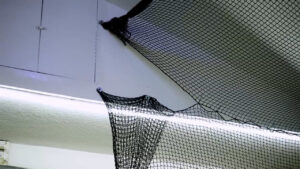
Side netting was also very important to me since kids and adults of all skill levels will be using this simulator. The top and side nets are from Amazon and were $40 each, and I attached them together with zip ties every few inches. The side nets work perfectly and can stop any shank or mishit, while the top net mostly works to slow down any balls that would normally hit the ceiling and direct them towards the screen, but doesn’t completely prevent contact with the drywall. I may install some foam tiles above the simulator at some point, but for now it doesn’t seem like an issue.
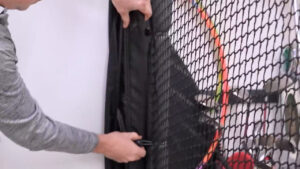
Since the whole screen folds up into the vaulted area it was simple to attach the netting to the sides of the vaulted space with a few screws and washers, and because I got the Carl’s Place screen with flaps and Velcro I just used some non-adhesive backed 1” Velcro to make a sealed connection between the netting and the impact screen which prevents any balls from going to the sides, above, or under the screen. When the screen is down I attach a sandbag to a carabiner on the end of the net to weigh it down, and when it’s time to put the screen away I attach those carabiners to the opposite sides of the net, which stops the nets from drooping over the side of the screen and getting trapped between the frame and vaulted wall space.
Speaking of which, remember how I said it was a mistake to have such small tolerances on each side of the screen? I originally thought that the netting and Velcro would be enough to stop a poorly hit ball from hitting the steel screen frame and ricocheting around the room like a pinball, but after playing with two 10-year-olds I figured out that was definitely not correct and that I needed to add padding to the frame. I used pipe insulation which works surprisingly well, and on the sides I had just enough room for the extra padding to fold up into the ceiling, but the bottom of the frame was too close to the floor to fit any insulation, so I had to screw some scrap wood into the metal frame to be able to add foam along the bottom.
Total cost of safety nets and foam padding was around $180, but definitely money well spent.
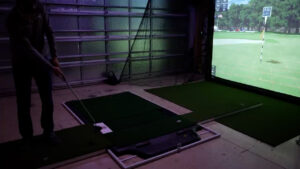
Moving on to my biggest regret: the TrueStrike golf mat. When I was originally dreaming up this project, I envisioned a rigid hitting area that I could pick up and rest against the wall when not in use, and when I was finalizing my order on Carl’s Place I saw the TrueStrike mat, which looked high quality, modular, and rigid. It was quite a bit more expensive than the other options at $1058, but I had read that using a cheaper mat can cause wrist and elbow injuries, and the rigid plastic base seemed like a great solution for my temporary setup.
I was wrong. The TrueStrike mat is fine when it’s laying on the floor, but it’s a floppy mess when you try to lift it. I even tried screwing each piece together both horizontally and vertically on the joints, but the mat was still an 80-pound floppy nightmare to move around, and I decided that storing it on the side of my garage wasn’t going to be an option. Unfortunately because hitting mats are so heavy returning them isn’t really an option since return shipping would have been a quarter of the initial purchase price and on top of that Carl’s Place charges a 15% restocking fee to cover their shipping costs, so I would have been out almost $500 by switching mats.
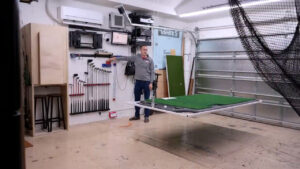
In my original drawings for this simulator I had considered a hitting area that folded up in two sections onto the screen frame to be hoisted up into the vault, but unfortunately I would have needed a different style of mat for that option, so my next plan was to raise the entire TrueStrike mat into the ceiling space. It is possible to use a single hoist and pullies to move multiple lifting hooks, but you have to have a lot of travel distance for those solutions, so the simplest option was to just use two hoists.
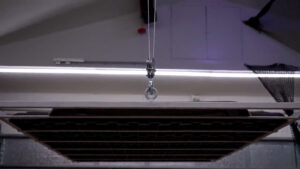
I built a frame out of 1” steel tubing and 1” flat stock and welded lifting shoulder eye bolts rated for 2400lbs to each side. I used two smaller hoists rated for 220lbs single line or 440lbs doubled up and mounted them to another piece of Unistrut. I ended up doubling them up, not for lifting capacity, but to reduce their speed since lifting at full speed caused the hitting mat to bounce and flex.
Even though it wasn’t my first choice, the lifting mechanism works extremely well and results in the hitting mat being in the exact same location every time. The only thing I haven’t figured out is a way to add an additional safety mechanism in case one of the hoists were to fail when it was lifted overhead. Let me know down in the comments if you have any ideas.
Total cost for the hitting mat and hoist solution was $1550, which is way too much, and I would have ended up with a much better overall solution if I had just gone with a Carl’s place mat and divot strip from the beginning.
The other issue caused by the TrueStrike mat is that any putting strip needs to be raised approximately 2” off the ground to be in line with the mat. I used readily available putting turf from Home Depot that came in 8ft widths and any custom length at a cost of $12 per linear foot. I used a 10 foot section in front of the screen to stop balls from bouncing off the concrete floor, and then using some Styrofoam and 1/4” plywood I built two small runways for behind and in front of the hitting mat to use for putting. The Mevo+ is notoriously tricky to putt with, but I’ve had pretty good success by setting my putting distance to 3ft from the Mevo. I painted a small square on the turf where putts should be started, and another small square 10 feet from the first one to help gauge distance.
Cost for turf and the putting strips was $196.
And the last thing that every screen-based simulator needs is a projector, and I’ve got some possibly unpopular opinions about this. On golf simulator forums and Facebook groups, I constantly see people posting about using ultra high end 4K laser projectors in their simulators, which of course then requires a high end gaming PC to output those graphics. It would be easy to spend between 7 and 10 thousand dollars on the projector and gaming PC alone, but ultimately you’re projecting onto a textured impact screen that isn’t fully tensioned and is eventually going to get dirty and deformed. If you’re looking for an area to skimp and save some money, the computer and projector are the best place to do that.
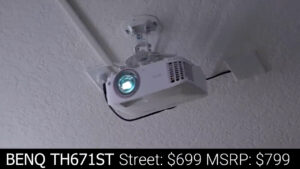
I’m using a BENQ TH671ST short throw projector which I’ve had for years and costs around $700. It’s a 1080p bulb projector, so brightness and colors will degrade over time, but while you could easily put 3000 hours on a TV replacement projector over the course of a year, it will probably be at least a few years before you put 3000 hours on your golf simulator.
For the computer I’m using an older Dell Vostro that a friend of mine in IT gave me for free, but similar PC’s are available on Ebay for around $250. This computer will absolutely not handle 4K resolution on ultra high settings, but 1280 x 1024 medium settings work just fine. If you’re my age you also might remember that resolution from old CRT monitors and know that it’s a 4:3 aspect ratio instead of the much more common 16:9 resolutions. I see a lot of people playing golf simulators with huge black bars on the top and bottom of the screen just so they can use higher resolutions, but to me that seems like a mistake, and I’d personally rather fill more of my screen and run a 4:3 ratio.
The simulator software I’m using is GSPro which is sort of the young underdog of the simulator world and is not only less expensive than all the alternatives, but also has the best course selection since instead of producing their own courses and gatekeeping them with a subscription, they released a course building tool and rely on the GSPro community to build new courses.
As I said, I already owned the projector and the computer was free, so my total cost was just the GSPro software, but you could get a similar setup for around $1200.
So to get to this point I’d spent $8375 to raise the ceiling, build the simulator and get it all up and running, but there were a few more things that I wanted to add to make it feel a little bit cooler.
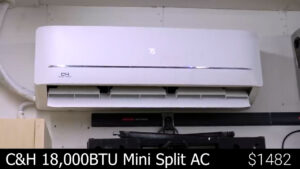
Starting in the most literal sense. Playing golf in the garage in Florida means you need air conditioning. I installed an 18,000BTU mini split from Coopers and Hunter which cost a total of $1482 and was actually pretty hard work to install. It took me around 7 hours over two days to get everything mounted, run the electrical, run the cooling lines, and get everything looking nice. I did save around $4500 by installing it myself, but it was definitely difficult.
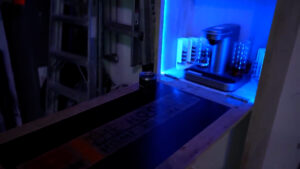
When I posted my preliminary setup on Reddit someone commented that every good golf simulator needs a bar, and I agreed, so I built what I would call a murphy bar which tucks up out of the way when not in use, but provides a good spot for a couple spectators and a place to set down your drink. I also happen to have an extra Bartesian cocktail machine right now, so this one gets to live in the garage bar.
Total cost for the DIY murphy bar and stools was just over $150, and build time was about 2 hours.
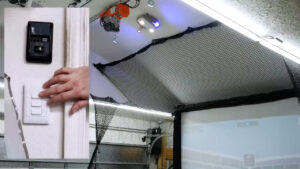
Last, I used a few smart home products to give the simulator a little flair and make it a little safer. My garage came with a single light and a single switch, but that was wildly insufficient for everything I do in the garage, so instead of going through the hassle of pulling more circuits back to the switch I just installed this 3 button Zigbee switch from Zemismart. The top button operates the original switch circuit connected to the first bank of LED shop lights.
The second button is synced via Home Assistant to 4 Shelly WiFi bulbs above the simulator which I keep around 30% brightness, so they don’t wash out the projector screen.
The second switch is also tied to a smart plug attached to my garage door opener, and whenever the simulator lights are on, the garage door plug turns off which prevents anyone from accidentally opening the garage door while the simulator screen is down, which would be a disaster for both the screen and the door.
The last switch is just synced via Home Assistant to another smart plug that controls the last bank of LED shop lights. So with one switch circuit I can virtually control 3 banks of lights, which is pretty handy.
Another thing I’m using Home Assistant for is to get easy access to some common hotkeys used in GSPro. I’m using the Hass Agent windows program in conjunction with a $25 4-button Zigbee switch to relay button presses for the left and right arrow keys for aiming, the B key which removes obstacles that are blocking your view, and of course control-M which is the mulligan hotkey in GSPro. The buttons are big enough to press with your club without bending down, and this solution was much smaller, cheaper, and more flexible than the off the shelf simulator control boxes.
I also 3D printed a surround for it so it would fit into the back cutout of the TrueStrike mat.
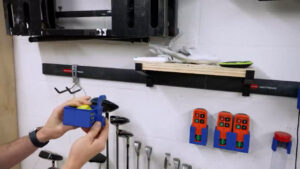
Speaking of 3D printing, I also 3D printed some accessories for my Rubbermaid FastTrack rail system, which I mostly hate. The overall system works fine, but each hook and accessory is ridiculously expensive, like they want $25 for this 15-inch black plastic bin. Thankfully someone on Thingiverse modeled the connection hook, so you can just stick it on anything you want now. I made some cupholders, a basket for tees and a small shelf for about $5 in plastic.
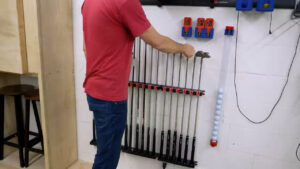
I could have also printed the rack for my golf clubs, but ended up just buying a wall mount meant for fishing poles, which does a great job holding my clubs and my daughter’s clubs for easy access.
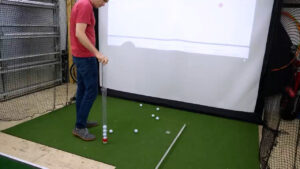
The last thing I bought was a $25 ball tube, not only to store the ProV1 RCT balls in between rounds, but also to make picking them up from the hitting area easier, and this is definitely one of the best purchases I’ve made, not only for speeding up my rounds, but also saving my back.
So, drumroll please! This golf simulator garage transformation cost a total of $10,177 which is definitely not a budget build, BUT included structural ceiling modifications, insulation, air conditioning, and of course all the materials and equipment required to stow the entire simulator when not in use.
As I mentioned, nothing in this video was sponsored and I bought everything with my own money. With that said, I am an Amazon affiliate, so if you saw anything that you liked in this video I’ve put links for basically everything down below, and if you use those links I do get a small commission on the sale at no cost to you.
If there’s a significant interest in any part of this video I may do some follow up stuff on the simulator, but otherwise thanks for indulging me by watching this content that is only loosely related to my channel. I did do a massive amount of research before selecting my golf sim gear, so if you’ve got other questions feel free to ask them in the comments of the YouTube video and I’ll try to help out however I can.
Thank you so much to all my patrons over at Patreon for your continued support of my channel, and if you’re interested in supporting my channel please check out the links below. If you enjoyed this video consider subscribing to my YouTube channel and as always, thanks for watching The Hook Up.
FlightScope Mevo+: https://shop.carlofet.com/launch-monitors-and-software/launch-monitors/flightscope-mevo-plus-launch-monitor?acc=1becf26e9f32353e30870060538746e7
Carl’s Place Custom Impact Screens: https://shop.carlofet.com/build-your-own-golf-simulator?acc=1becf26e9f32353e30870060538746e7
Carl’s Place Hitting Mat: https://shop.carlofet.com/golf-hitting-mats/hitting-mats/carls-hotshot-golf-mat?acc=1becf26e9f32353e30870060538746e7
Smaller Hoist (Hitting Mat Hoist): https://amzn.to/40JWGg1
Larger Hoist (Screen Hoist): https://amzn.to/3YHM8wc
Side Netting: https://amzn.to/3XrNGJz
BENQ TH671ST Projector: https://amzn.to/3HYoLYC
Mini Split AC: https://amzn.to/3YKOSZL
Wall Mount Club Rack: https://amzn.to/3YkCRKx
Golf Ball Tube: https://amzn.to/3JXWtzO
GU10 Light Fixture: https://amzn.to/3HTm1eY
**As an Amazon Affiliate I earn a commission on qualifying purchases at no cost to you**
Visit my YouTube channel: https://www.youtube.com/c/TheHookUp
Follow me on Twitter: https://twitter.com/thehookup1
Join me on Facebook: https://www.facebook.com/groups/473812443269387
Support my channel directly at Patreon: https://www.patreon.com/thehookup

