Node Red + Home Assistant 2022: Beginner, Advanced and EXPERT Motion Detection and Notifications
June 16, 2022Today on the hookup we’re going to dive back into Node-RED and Home Assistant to take a look at beginner, advanced, and expert versions of motion detection lighting and mobile notifications, and along the way I’ll show you some new tips and tricks that you might not have seen before.
A full 18 months ago I made my second installment of node red for beginners, and at the end of the video I said this…
…and that obviously never happened, but not for lack of trying. In fact, I wrote about 10 pages of node red video scripts based on your automations that I’ll never end up using. The problem with making videos about specific complex automations is that they’re only applicable to that one use case, and as a result I thought the videos were frankly pretty boring and not that educational. So instead, in this video we’re going to focus on more general stuff that should be easy to learn, easy to use, and easy to modify for your needs.

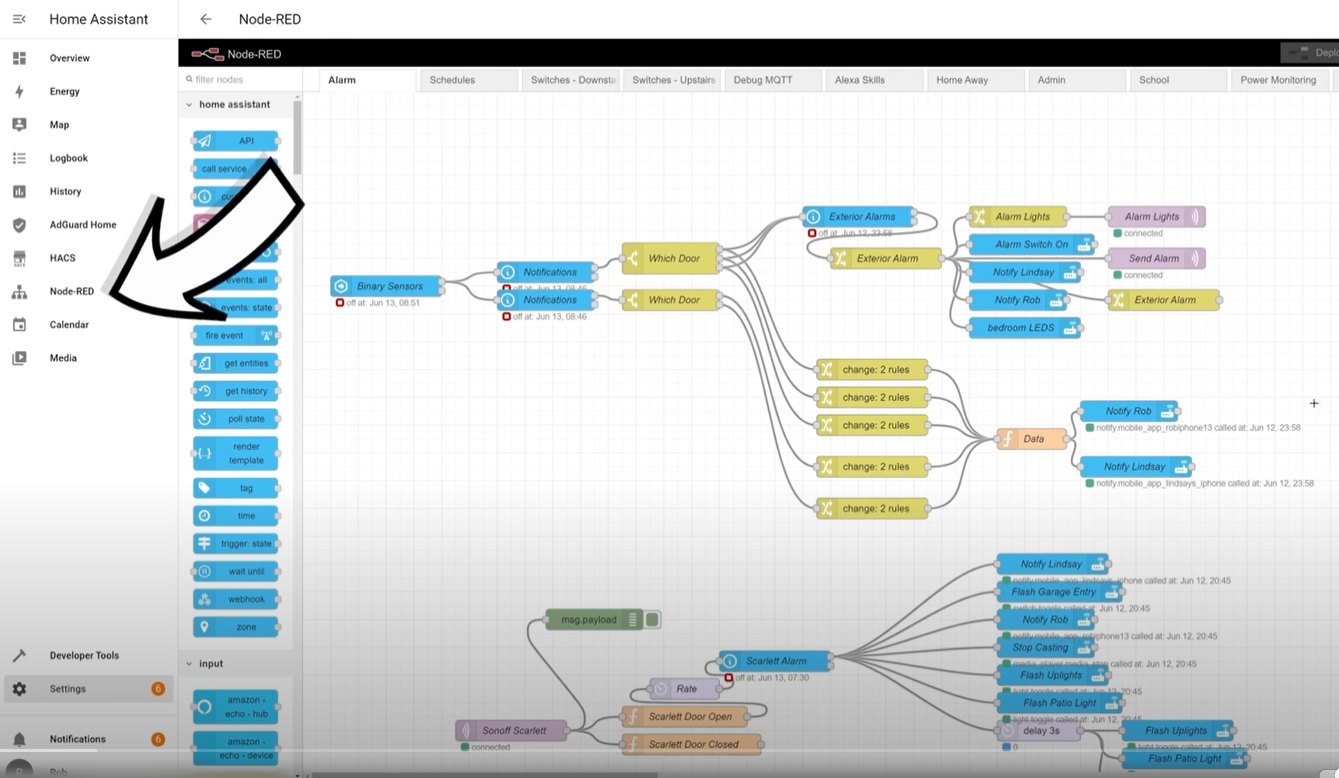
If you’re into home automation and home assistant but you’ve never touched node-red, I highly recommend watching my other videos first, but the basic concept is that home assistant is great to get
all your devices into one locally controlled ecosystem and then node red, specifically the home assistant node red addon is the perfect environment to automate them.
Lets start with the easier automation to get our feet wet which is motion based lighting, because it seems great in theory, but you’d be surprised how annoying it is when done poorly and the lights turn
off while you’re still in the room.
In one of my earlier node red videos I showed this sequence which uses the home assistant events state node to monitor the state of a motion sensor and then goes into a switch node to separate the states for motion on and motion off.
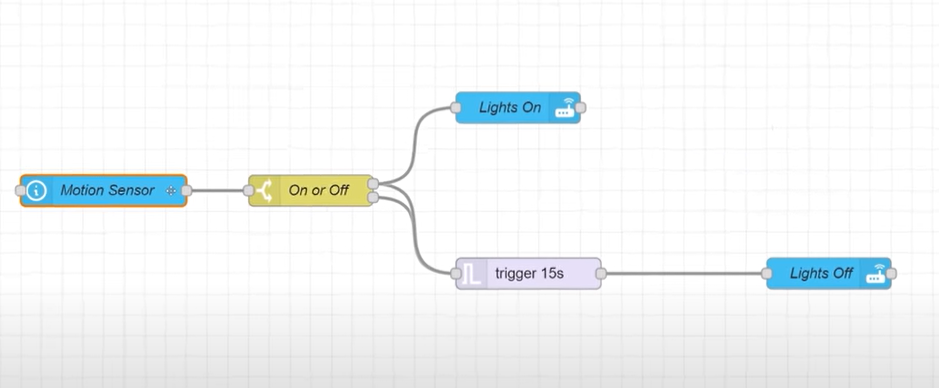
If there is motion the lights turn on, and if there’s no motion it goes into a trigger node that delays the payload for 15 seconds to see if the motion sensor will be triggered again, in which case it will clear that 15 second timer and wait until the next time there is no motion to start it again. If you want to decrease the chances of the lights turning off while you’re still in the room you can just increase the wait time on that trigger node.
And while this sequence still works today, the home assistant node red integration has gotten a lot better since 2018, and the beginners version of this automation now can take place almost entirely in the events state node itself.
To do it, I’ll select my motion sensor from the auto populating drop down, then for the output I want to put “is off” “for 15 seconds”.
When I click done my events state node will have two output connections, the top one will output only if the state has been off for 15 seconds, and the bottom one will output any state that isn’t “off”.
After that, all I have to do is connect a call service node to the top connection to turn the lights off, and a call service to the bottom connection that will turn the lights on.
The on payload will happen immediately on motion, but the off payload will wait 15 seconds after a no motion payload before turning off the lights, again to decrease the chances of the lights turning off while you’re still I the room you can increase the 15 second delay.
My motion sensor only has the states on and off, but home assistant does have two other states that correspond to data availability: the first is unknown where there’s no historical data and nothing has been recently reported, and the second is unavailable where the motion sensor itself has lost connection with home assistant.
If I click on the events state node I’ll can see a bunch of options at the bottom that pertain to unknown and unavailable states, and for this automation I’m going to check all those boxes because I don’t want those unknown and unavailable states to trigger the light to turn on.
I could also filter out only the “on” messages with a switch node in between the bottom output and the light turn on service, but the check boxes in the events state node will accomplish the same thing.
The other check box that I have in my events state node is “expose to home assistant”, which is there because I have the node red companion integration installed through HACS. If I check that box I get a switch in home assistant that can enable or disable this specific sequence.
And that could be useful if your motion sensor controls the lighting in a theatre room where you don’t want a motion event to turn on the lights during a movie, or in an office where you could override the motion sensing lighting based on time of data or other data like a computer being on.
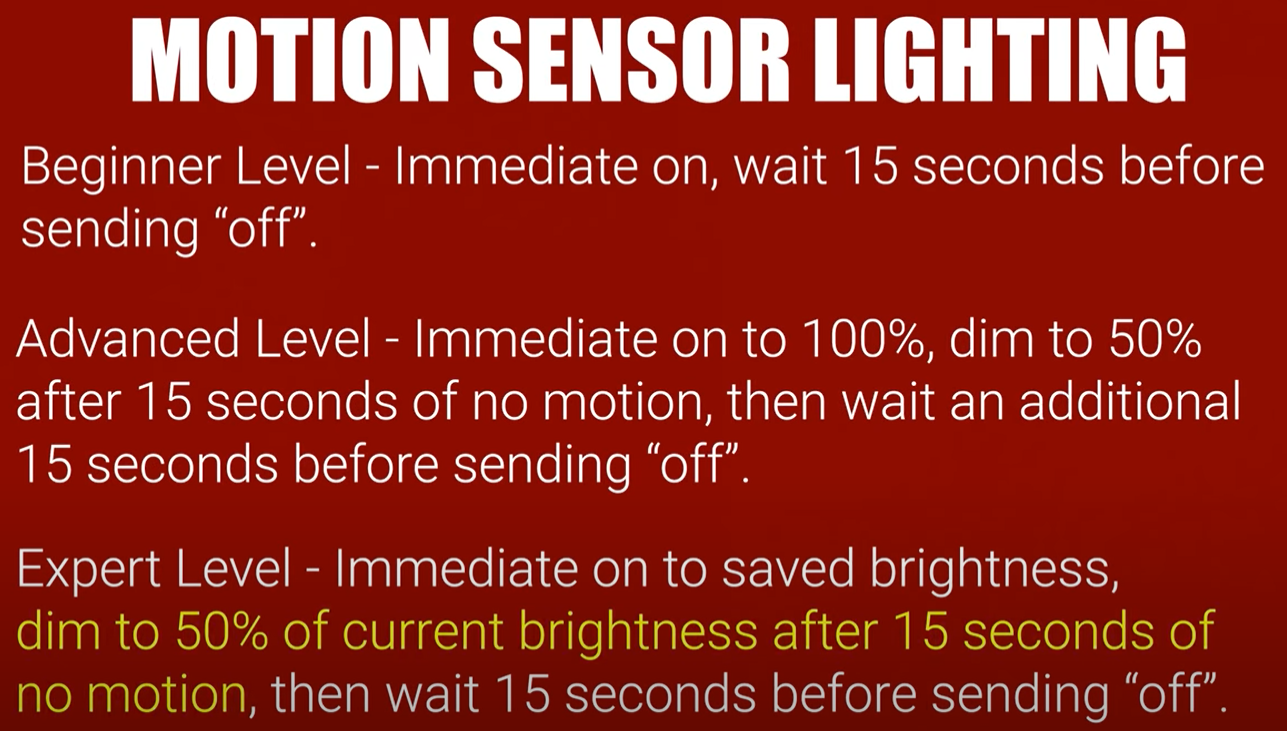
If I wanted to step this automation up to a more advanced level I could dim the lights after 15 seconds of no motion and then wait an additional 15 seconds before actually turning them off. While this isn’t perfect solution, dimming is less jarring than the lights turning completely off and gives you a visual cue that motion hasn’t been detected in a while.
To do this I’ll add a trigger node, and in the output I’ll put the string dim, and then wait for 15 seconds then send the string off. The actual messages here don’t matter, and I just do it to help me visualize what’s happening in the sequence and to make it easier to debug later if needed.
In the trigger node check the box that says “send second message to separate output” and “reset if msg.payload equals” should be set to “on”. Then I’ll connect the trigger node to both outputs of the event state node, put a call service to turn off the lights on the bottom output of the trigger, and on the top output I’m going to put a call service node for turning on the lights but to a lower brightness.
To do that, I’m going to need to specify some data in the call services node, which is much easier to do than ever before. You can see that once I select the light turn_on service I get a list of all the possible attributes that I can specify.
Lets say I want to set the lights to 50% brightness, for that I’d use the brightness percent attribute, so I can copy it, then go to data and select json, then click on the three dots, go to the visual editor, click on add an item, paste my brightness percent attribute and put in 50 for the value. Technically home assistant wants a number here and not a string, but it’s smart enough to convert it for you so you don’t need to worry about it.
If you feel comfortable writing your own json you obviously don’t need to use the visual editor, but I think it’s a pretty cool feature.
The other thing I need to add in this automation is brightness in the call services node for when motion IS detected, so copy that json data that we just generated, go into your other call services node and paste it into the data field with your desired brightness, I’m going to go for 100%.
But I hear what you’re saying, maybe you don’t always want the brightness to be 100%, maybe you want to be able to set it, and that brings us to the expert level automation.
For this, the warning brightness will be 50% of whatever the existing brightness is, and then on motion I’m going dynamically set the brightness back to whatever it originally was.
To do this I’ll add a current state node in between my trigger node and my low brightness node. In the current state node I’ll select my light entity, then in message payload I’ll output the state, in message data I can output the entity, which will give me all its attributes, and I’ll add one additional output as a flow variable called flow.light_brightness which will also contain all the entity data.
To set the brightness to 50% of itss current brightness I’ll need to know where that brightness data is stored, so I’m going to grab a debug node, set it to output the complete message object, and put it after this current state node. Now when that part of the sequence is triggered I can see the output in my debug window and if I click down into msg.data I can see there is an attribute called brightness and if I hover over it and click on the first icon it will copy the path to that attribute.
Now in my call services node I can replace my hard coded brightness with msg dot, then paste the path that I just copied and add divided by 2 at the end. This is also specifying the brightness out of 255 and not the brightness percent out of 100, so I’m going to change the attribute name from brightness percent to brightness. You’ll also need to make sure that the msg.data path isn’t in quotes, and you need to change the format of the data field from json to expression.
I’m also going to go back and edit the call services node for when motion IS detected and change that hard coded brightness to also use msg.data.attributes.brightness, but this time not divided by two.
However, since the brightness payload is generated after this point in the sequence it won’t be accessible for this node and instead I’ll need to read the flow variable that I set earlier. To do that I’ll use a change node in between the events state and call services node to set msg.data to equal flow.light_brightness.
Then I’ll add msg.data.attributes.brightness to the data expression in the call services node and I should be all done.

I’m not exactly sure why the change node is necessary and I was expecting to just be able to call flow.light_brightness in the data field of the call services node, but for some reason it doesn’t work, so the extra step is required.
Lets do some quick tests to make sure everything is working as intended. Lights on to 75%, 15 seconds after the motion sensor reports no motion the lights go to 37%, then 15 seconds after that they turn off. And importantly, when new motion happens the lights come back on to 75%. Perfect.
If you’ve got suggestions for something to add to make an expert+ mode, leave them down in the comments.
Next we’ll move on to notifications, which have also changed quite a bit since I first covered them over 4 years ago.
As you may or may not know I’m in the process of testing basically every smart doorbell camera on the market, so get subscribed if you’re interested in that. Anyways, in a perfect world I’d love to have all the functionality of my doorbell without the use of any cloud service, but that’s not exactly an easy task.
The UniFi G4 Pro Doorbell which just happens to be the doorbell I have currently installed does a pretty good job integrating into home assistant locally through unifi protect, but even though you can log into the unifi protect app locally now, you won’t get any notifications unless you use the unifi cloud, and logging into unifi protect using VPN still doesn’t work.
So for our beginner automation I’m going try to replicate the unifi protect notifications in home assistant instead.
To start the sequence I’ll use an events state node to grab any doorbell presses as they happen, so I want to set it to output only if the state is on which is what happens when you press the doorbell, and I want to check all the boxes to ignore unknown and unavailable states.
After that I’ll use a call services node to send a notification to my phone ONLY by selecting notify as the service and then choosing my phone from the dropdown. If I used the notify.notify service it would send a notification to every available device, but that’s not what I’m looking for.
You can see down on the bottom I’ve got a few options for attributes to add to the data field. I’m going to select json for the format and then click on “load example data”, after that I’ll click the three dots and go over to the visual editor.
I’ll change the title and message first, and for this service I don’t need to specify a target so I can remove that entry entirely. Last I want to convert the data entry into an object by selecting object from the dropdown.
Once I’ve done that if I click on the arrow next my data object I can add an item, and for the first item I’m going to add the UniFi G4 Pro doorbell camera feed.
To do that, I’ll type in entity_id, and then I’ll put in the name of the G4 pro doorbell camera. Unfortunately in the editor entity names don’t auto complete, so I’ll need to type the name of the camera exactly.
Once your done hit deploy and test it out. A quick press of the doorbell shows us the automation is working as intended and the beginners sequence is done.
To step it up a more advanced level I’m going to add some action buttons to the notification. So go back to your call services node, back into the visual editor and add another item to your data object. This item will be called “actions” and it’s going to be an array of objects so select array, and then add an item to it. Each item will be an object with at least two parts: the first will be the event name that will be sent to home assistant when the button is pressed, and that needs to be in all caps. The second part is just the text that you want to appear on the actionable notification button.
To add a second button all you need to do is click on the arrow next to that first object and hit duplicate, then go through and change the entries as needed. I’m going to have a total of 2 actionable buttons: first will be a canned response to say “leave the package to the door”, and I’ll call that one “leave package”, and just for fun I’m going to call the second one “please leave” which will tell the visitor that I’m not interested and turn on the front sprinkler system to encourage them on their way.
There is an annoying bug in this version of node red that doesn’t let me add spaces to a string within the visual editor, but if I click on the normal json editor I can just add the spaces to my titles afterwards, and there shouldn’t be any spaces in the home assistant event names.
If I save this node and hit deploy my notification will work and I’ll have 2 buttons, but neither of them actually do anything. For that I’ll need to add a home assistant events all node, and tell it to look for the event type mobile_app_notification_action. After that I’m going to need a switch node to figure out which button got pressed and which action got fired, but before I can do that I need to know where to look for the action name. So I’ll add a debug node, double click it and select output complete message object.
Now you can see that when an action is fired the action name is in msg.payload.event.action, so again I can click the copy path icon and then in my switch node I can just paste that in as the property I’m looking for. After that I’ll add a different switch condition for each of the possible actions and I’m ready to automate from there. If I want to add more and different notification actions later I can still just use this same events node and just continue adding my event names to the switch node.
For the canned message I’ll use a call services node with the TTS service and the G4 pro doorbell speaker as the media player target. I’ll use that load example data button again to format my json and then edit it for my specific message, which for this will just say “Please leave the package at the door”.
I’ll also have a TTS message for my please leave button which will say “No thank you, we’re not interested”, and after that I’ll give a 10 second delay and before activating my rachio sprinkler system zone in the front yard.
Then then I’ll put in another delay node for 1 minute, and use another call services node to turn the sprinklers back off.
Lets test it out!
Pretty good, but let’s step it up to expert level.
For the “Leave the package at the door” action I’m going to add two more options to the notification itself. The first one is a URI which will open up the home assistant app to my front yard cameras tab whenever that action is pressed and the second will have behavior as the action and textInput as the value, which will open up a keyboard on my phone for me to type in a TTS message.
Just like before I need to find where that message ends up, so I can use a debug node with my home assistant events all node to find it, and sure enough in msg.payload.event.replytext I can see my text input so I’ll click copy path, then go to the tts node and instead of our original message I’ll paste the path to the text input message.
For the go away action I’ll also add the URI to go to my front yard cameras tab in home assistant, but I’m also going to make the sprinkler response a little smarter. This time after 5 seconds I’ll use a current state node to see if the person detection on the G4 doorbell is still active, meaning the unwanted guest hasn’t left, in which case I’ll turn the sprinklers on.
After that, I’ll use the new wait for node, setting it to wait until the state is equal to “none”, meaning a person is no longer detected. I also don’t want the sprinklers to run for too long, so I’ll set the maximum timeout for 1 minute, and then pump both outputs into the call services node to turn the sprinklers back off.
And now we test.


Perfect. Let me know what else you would add down in the comments.
Sorry it took so long, but I’m hoping this video gave you a few ideas for how you can automate your devices with home assistant and node red, and with any luck it won’t be another 14 months before I make another one.
Thank you so much to all of my patrons over at patreon for your continued support of my channel, and if you’re interested in supporting my channel, please check out the links down in the description. If you enjoyed this video please consider subscribing, and as always, thanks for watching the hookup.