Finding the BEST PoE IP Security Camera Under $150
July 14, 2019PoE Camera Comparison Spreadsheet (PDF): PoE Ranking Spreadsheet
Today on the hookup I’m going to put these 8 PoE security cameras through their paces and tell you which one is by far the best… spoiler alert: it’s this one.
Straight to the point: The best all around camera that I tested was hands down the Reolink RLC-410. Stick around to see why, but if you’re in a hurry, I can assure you that you won’t be disappointed if you choose the Reolink.
Let me start off by saying that ALL of these cameras are nice and are so much better than the analog security cameras that I upgraded from. But the purpose of this video is to determine which of these popular cameras under $150 is the BEST.
I selected these cameras based on the Amazon ratings for wired IP cameras and recent reddit and forum posts where users gave suggestions for the best PoE cameras to buy. I specifically won’t be covering some popular brands like wyze, nest, blink and ring since I specifically was interested only in wired PoE cameras. Wireless is fine for non-critical devices, but for an application like a security camera, it is way too easy for bad people to deauth a wifi camera during a crime, and if the only recording option is in the cloud there will be no record of the incident at all.
With that out of the way, here’s the lineup ordered by price:
The most inexpensive camera on the list is the HFWS-5MP, a $50 5 megapixel camera that bears the “amazon’s choice” label and 4.3 stars.
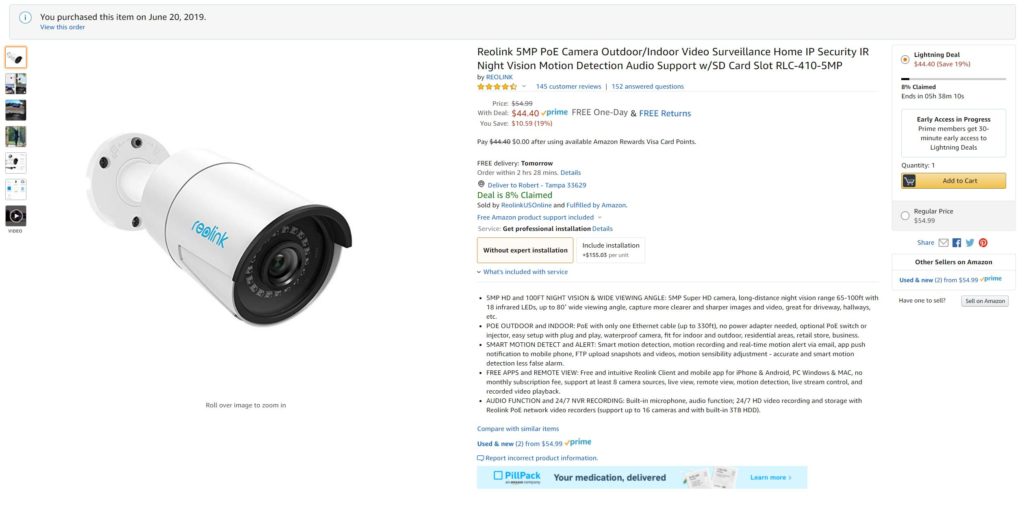
Next for just $5 more is the Reolink RLC-410 which also boasts 5 megapixels and that “amazon’s choice” tag.
Third is a Tuya based camera that sells for $47, but unfortunately I didn’t realize that it isn’t a PoE camera out of the box, so in order to make it PoE I had to buy one of these 802.3af PoE adapters for $8, bringing it’s total cost to $55.
Next is one of the most highly recommended cameras on CCTV forums, the dahua HDW46 which I picked up for $74, this one is 6 megapixel, which is the highest advertised resolution of any camera I tested.
Just above that for $76 is the UniFi G3 Flex which is compatible with the UniFi Protect NVR software but has limited outdoor usage since it isn’t 100% weatherproof.
Then it’s the $80 Amcrest IP4M which is the most reviewed camera I tested with 135 reviews with an average of 4.2 stars.
No IP camera review would be complete without testing the biggest name in IP PoE cameras, HikVision. I tested the 4 megapixel 2.8mm lens turret version which retails for $110.
And the most expensive camera in my test lineup was the UniFi G3 bullet, an all weather outdoor camera that works with UniFi protect and will cost you $130 on amazon.
In order to rank them fairly based on price I made the lowest price rank 1, and the highest price rank 8, then I used a mapping function to determine the price ranking of each camera, which made more sense to me than just scoring them 1-8.
For my first test I set up each of these cameras in the exact same position on my garage and I did my best to aim them with a consistent reference point, which is the white PVC pipe you can see in the bottom left corner. When you buy a camera it will often list the lens focal length in millimeters, and theoretically the lower the focal length the larger the field of view, but I’ve found that that doesn’t always work that way in practice.
Here are the listed focal lengths of the cameras I tested, so according to this, the dahua, amcrest and Hikvision should have the largest field of view. In practice while they mostly followed the expected trend, cameras with the same focal lengths performed very differently from each other. In my test the Amcrest bullet camera had the largest field of view with it’s 2.8mm focal length, followed very closely by the Hikvision, but the dahua which also has a 2.8mm focal length had a significantly narrower field of view. From there the next highest field of view was the HFWS camera which supposedly has a 4mm focal length, but it outperformed all the 3.6mm focal length cameras. Ranking 5th was the tuya camera from zemismart, then the reolink, and then not even close to the competition were the two unifi cameras which are both significantly zoomed in with low field of view despite their advertised 3.6mm focal length.
It’s true that field of view may be something that you would select based on the use case of the camera, because in theory a narrower field of view is going to give you better clarity for the part of the image that it actually sees, but again in practice that isn’t really the case, and the same goes for the megapixel rating or resolution of each camera, you’d think more pixels would equate to more clarity, but here’s what I found.
In order to determine the clarity score I held up a box with some 150 point text and marked off 10 ft, 25 ft, and 50 ft locations on the ground. It should be noted that the UniFi cameras had such a low field of view that they couldn’t see the sign at 25 or 50ft based on how the cameras were aimed, but I was able to get samples of the image close to 25ft and 50ft and I used those in the comparison.
For daytime tests at 25ft all the cameras were able to produce a mostly legible image of the 150 point font, but the reolink came out on top. None of the cameras were able to produce a legible image of the 72 point font from 25ft. At 50ft the results were similar but this time the UniFi G3 produced the clearest image with it’s zoomed in lens, although it should be noted that this image was likely taken at around 45 feet rather than 50, because the 50ft mark was out of frame for the G3. After the G3 the Reolink produced the only other image that was maybe legible, and the worst performer in this category, the tuya camera failed to even correctly reproduce the shape of the box.
Overall in the daytime clarity catagory I would rank the Reolink first, followed closely by the dahua and Hikvision.
For my nighttime test I compared the images of each camera at 25 feet and while performing this test I didn’t worry as much about being able to compare the field of view of each camera, but instead I wanted the IR LEDs for each camera to be pointed straight at the locations where I would be standing for my tests.
Similar to the daytime tests the clarity of the Reolink was unmatched followed by the Dahua and then the G3Flex, which is actually the cheaper of the two UniFi cameras. One strange thing that happened during this test was that the Hikvision’s nightmode was not triggered due to the ambient light provided by my neighbors porch light. After installing the Hikvision in my backyard I’ve noticed the same type of behavior where it goes into a “low light mode” before actually turning on the IR LEDs and night mode. This sensitivity is configurable through the web interface, but it comes set to 2 from the factory, which in my experience seemed too low, or actually too high since I later discovered that lower numbers make it more likely to switch to night vision. I currently have it set to 1 and it still switches to night vision later than I’d expect it to.
On that note I should probably mention that most of these cameras have pretty extensive setup options that can be used to tweak the picture by adjusting the hue, brightness, contrast, sharpness, white balance, noise reduction, and a bunch of other miscellaneous settings, but since the vast majority of users will never touch these settings, I decided to test these cameras straight out of the box. That being said, the reolink, amcrest, Hikvision, and dahua all had a similarly high level of image adjustment settings, while the UniFi cameras in standalone mode and the Tuya camera lacked any advanced control.
When logging into the web interface most of these cameras are going to want you to use internet explorer with activeX plugins. The HFWS was the worst offender, as it required internet explorer to even load the login screen properly, but the Amcrest, Dahua, and Hikvision will allow adjusting of settings in chrome, but only give a live image preview when using internet explorer. The reolink and the UniFi cameras on the other hand work perfectly in chrome and don’t require any strange plugins or downloads.
Speaking of strange downloads, the Dahua, Hikvision, and HFWS cameras all come with a static IP address that is on the 192.168.1.1 subnet, meaning if you run a different subnet on your network you’ll need to download a special tool to change the settings to DHCP before you’ll be able to connect to them. Not a huge deal since you only need to do it one time, but it’s yet another area where the Reolink got everything right since it took DHCP directly from my router and could be accessed immediately from chrome.
Also worth noting in the setup process is the ease of mounting and aiming for each of these cameras, the reolink has a ball and socket type mount that can be adjusted in any direction using a single screw, while the other bullet style cameras have a screw for each adjustment point, this doesn’t seem like a big deal from the ground, but at the top of a 25 foot ladder it does make a difference. The turret style cameras were all easy to mount, but he Hikvision stood out as the most easily adjustable in that bunch with just a single set screw to loosen that then allowed for movement in any direction. The G3 flex camera is extremely easy to aim, but can only pan and tilt and the roll is constant, which I found a little annoying when mounting it in the corner of my garage.
If audio is important for your application, you should be aware that the Hikvision, Amcrest, and HFWS cameras do not have a microphone and therefore will not record audio. In my tests the UniFi G3 had the best audio, followed by the reolink, then the Tuya, the Dahua, and last the G3 Flex.
So after all my tests here’s how the scores came out:
The winner by far was the Reolink with a total score of 11.43, and that’s with it finishing 6th in the field of view category even though it’s field of view is more similar to the number 1 ranked field of view camera than to the 7th and 8th ranked cameras.
The reolink comes in bullet or turret style and is also the easiest to setup in home assistant and is compatible with the new stream function. If you’re looking for an all around great camera to use with IP camera NVR software like blue iris, shinobi, or motion eye, the reolink is the clear option, but there may be other things to consider.
The Tuya camera had one of the worst scores, but that doesn’t tell the whole story. Tuya products aren’t really designed for a super user. If you don’t want to have an always on computer running NVR software you’ll want to be able to manage your cameras via an app. Tuya is already a powerhouse in the IoT market and their camera integration is really good as well. In the tuya app you can review your recorded clips from the optional SD card in the camera, you can have motion events trigger automations of other tuya products like turning on an a light or switch, and you can use the two way audio feature to talk to the person on the other side of the camera. In this way it is more similar to a ring or nest camera with the large added benefit of being a wired ethernet connection. That being said, if you’re going to be running a local NVR and not using the tuya cloud, you should probably steer clear of this camera. In my tests, the camera actually stopped working after a 7 days of being blocked from contacting the tuya cloud. At first I wondered if it was a random hardware failure, but after power cycling it a few times with no success I decided to temporarily remove the firewall rule blocking it’s access to the internet and the RTSP stream instantly came back online.
Similarly, the UniFi cameras which have good clarity, but poor field of view and a relatively steep price tag are not really intended to be used with a standalone NVR software but instead work best within the UniFi ecosystem where they can be combined with the cloud key gen 2 plus to gain more control and functionality via the UniFi Protect NVR software. The huge upside to using the cloud key as an NVR is that it is already an always on device, so using it as an NVR allows you to offload that processing from your computer. Blue iris is an insanely powerful NVR program and I love it, but it is realitvely difficult to setup and it does consume a fair amount of resources on your PC.
UniFi protect by comparison is about the easiest NVR software that I’ve ever used and because it’s running on dedicated hardware it doesn’t consume any resources on your PC. The downside to UniFi protect is of course that it only works with UniFi cameras and that fact isn’t likely to change any time soon. I hesitate to say this because it could be taken in a negative way, but Ubiquiti is a bit like the Apple of networking gear, you’ll pay a little more for the name, and it doesn’t always play well with devices from other manufacturers, but if you stay within their ecosystem they produce an unrivaled end user experience.
One thing I didn’t cover in this video is the security of each of these camera brands: and it’s a topic that has proven to be a valid concern as companies like Hikvision have had pretty serious vulnerabilities in their firmware in the past. The reason I didn’t talk about security is that I suggest that you never let any of these cameras see the internet and that you quarantine them on your home network. It is really the only way to ensure that your camera feeds stay private and vulnerabilities in firmware don’t compromise the rest of your network. If you’re interested in how I handle the cameras on my network check out my ultimate home network series, specifically part 3 where I show you how to setup VLANs and firewall rules.
As always, if I missed something, or got something wrong make sure to let me know down in the comments. Thank you to all my awesome patrons over at patreon for your continued support of my channel. If you’re interested in supporting my channel check out the links in the description. If you enjoyed this video please consider subscribing, and as always, thanks for watching the hookup.


